Offline-resilient Mixpanel tracking for Ionic without a Cordova plugin

Mixpanel is a tracking and analytics platform that allows you to track and analyse user behaviour in your apps.

Mixpanel is a user behaviour event tracking library for the Web, iOS, and Android

Mixpanel provides great libraries for Web, iOS, and Android.
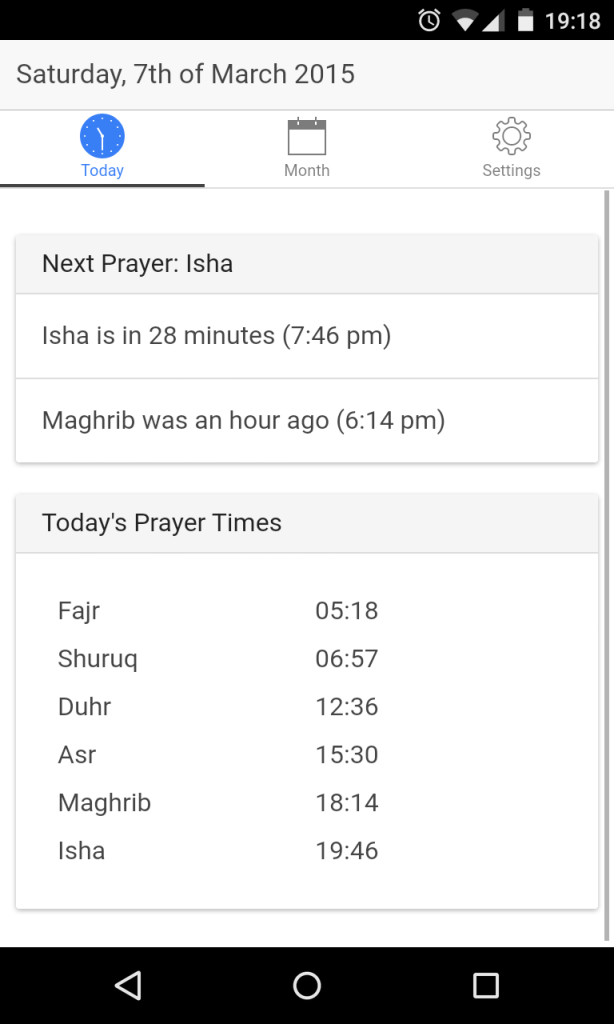
But what about cross-platform web applications that run in Cordova? This is the problem I was faced with when I tried to integrate Mixpanel analytics into my simple prayer times app.

Why not use the Mixpanel JS library?

The most obvious solution is to use the JS API that is provided directly from Mixpanel. However, there’s a problem with this approach. The JS API assumes always-on connectivity. However, as we know, mobile phones aren’t always online. If you want to track user behaviour while they’re on a plane or when they don’t have a connection, you can’t use the JS library. Mixpanel even say this in a blog post.

Wrap iOS and Android with JavaScript

To track events using Mixpanel while the user is offline, you need to implement a queuing system. The iOS and Android libraries implement this. In fact, there is a Cordova plugin that hooks into the official Mixpanel iOS and Android libraries - so you can track mixpanel events using

Although this will work, there are a few problems with this approach:

  1. Your app will depend on three libraries: the iOS, the Android, and the wrapper libraries. You’ll need to manage these dependencies properly as updates come in. This will also increase the size of your app.
  2. Other platforms will not be supported. For instance, Windows Phone will not be supported unless a wrapper for that comes out.
  3. Performance considerations. It’s good to bear in mind that calling Java and Objective C from JavaScript is not a smooth process, and it will include serializing and unpacking data you send to and from the native libraries. This may give an overhead when tracking events.

Mind the queue: write your own Mixpanel library

Luckily, we don’t have to settle for a native wrapper. Mixpanel also provide a RESTful HTTP API. We can implement our own Mixpanel library that allows for offline tracking.

The trick to offline event tracking is to keep a queue of things that you’re going to send to Mixpanel. We can use the http API from mixpanel to send the events.

1
2
3
4
5
6
7
8
9
10
11
12
13
14
15
16
17
18
19
20
21
22
var queueBuffer = [];
function pushToQueue(val){
val.id = queueBuffer.push(val) + (new Date().getTime());
return val.id;
}


function track(event, properties){
var nowTime = new Date().getTime();
pushToQueue({
event: event,
properties: _.merge({time: nowTime}, registrationProperties, properties || {}),
timeTracked: nowTime,
endpoint: 'track'
});

if(queueBuffer.length > 4){
push();
} else {
schedulePush();
}
}

Not online? Wait in the queue!

Periodically, we attempt to send 4 items in the queue. If the send succeeded, we remove those 4 items and continue with the next items in the queue. If the send failed, we keep the items in the queue and try again later.

1
2
3
4
5
6
7
8
9
10
11
12
13
14
15
16
17
18
19
20
21
22
23
24
25
26
function doPost(endpoint, subQueue){
if(subQueue.length === 0){
idCounter = 0;
return;
}
var preProcessQueue = endpoint === 'track' ? preProcessTrackQueue : preProcessEngageQueue;
var queueEncoded = base64.encode(JSON.stringify(preProcessQueue(subQueue)));

$http.post(TRACKING_ENDPOINT+endpoint+'/', {data: queueEncoded}, {
headers: {'Content-Type': 'application/x-www-form-urlencoded'},
transformRequest: function(obj) {
var str = [];
for(var p in obj) {
str.push(p + "=" + obj[p]);
}
return str.join("&");
}

}).then(function pushSuccess(){
removeQueueItems(subQueue);
schedulePush();

}, function pushFail(){
schedulePush();
});
}

App closing? Save the queue for later

We need to persist the queue when the user switches app. This is because we don’t want to loose all the things in the queue when the user switches or even closes the app. We can use localStorage to save the data. Every time the user switches or closes the app, we save the queue onto local storage. Then when the user opens the app again we restore the queue from local storage and continue periodically processing the queue.

1
2
3
4
5
6
7
8
9
10
11
12
13
14
window.document.addEventListener('pause', function(){
persist(QUEUE, queueBuffer);
queueBuffer.length = 0;
}, false);

window.document.addEventListener('resume', function(){
var queue = restore(QUEUE);
if(!queue){
queue = [];
persist(QUEUE, queue);
}
queueBuffer = queue;
schedulePush();
}, false);

Queue getting long? Compress it

Because we are using local storage, we are limited by the amount of data we can store. Typically, local storage has a maximum budget of about 5mb. If we use local storage for our app data, this can be a problem. We have a few options, but for maximum compatibility with all browsers, we can still store the queue in local storage but compress it first. We use a string compressor to reduce the size of the string we store in local storage.

1
2
3
4
5
6
7
8
9
10
11
12
13
function persist(key, value){
var valueCompressed = LZString.compress(JSON.stringify(value));
window.localStorage.setItem(key, valueCompressed);
}

function restore(key){
var item = window.localStorage.getItem(key);
if(item){
return JSON.parse(LZString.decompress(item));
} else {
return undefined;
}
}

As shown above, we use the LZString library to compress and decompress the stored string. As a very simple analysis, let’s say we want to compress a few very simple mixpanel events which don’t hold much data. The JSON data to store in localStorage would look like this:

1
2
3
4
[{"event": "Level Complete", "properties": {"Level Number": 9, "distinct_id": "13793", "token": "e3bc4100330c35722740fb8c6f5abddc", "time": 1358208000, "ip": "203.0.113.9"}},
{"event": "Level Complete", "properties": {"Level Number": 9, "distinct_id": "13793", "token": "e3bc4100330c35722740fb8c6f5abddc", "time": 1358208000, "ip": "203.0.113.9"}},
{"event": "Level Complete", "properties": {"Level Number": 9, "distinct_id": "13793", "token": "e3bc4100330c35722740fb8c6f5abddc", "time": 1358208000, "ip": "203.0.113.9"}}]

This is approximately 1392 bytes. If we compress it with LZString, it would look like this:

1
2
3
4
5
6
7
8
9
10
11
12
13
14
15
16
17
18
19
20
21
22
23
24
25
86 36 44 f0 60 0a 10 6e 02 76 01 e6 00 70 01 8c
84 96 62 03 08 83 60 0f 80 2d d8 0e 04 4f 03 60
89 46 38 01 44 12 c0 f7 84 25 3b 03 b8 22 cb 98
1c 80 57 80 00 22 58 8c 09 f0 4c cb 13 00 9d 36
c0 da 6f 0c 3e 00 39 9b c0 3c 60 04 c0 0c 8a 1d
9a 7e e0 69 0d 10 07 67 7d 44 54 62 65 01 01 d0
fe 85 2e fd e8 57 c8 0a 13 60 a1 3f 8b a3 19 80
80 98 0a 07 1b 80 4f 28 21 80 9c 98 8a 9c 98 99
11 3b 2a 15 8f 01 7f 84 84 8b 8b 5b 9b ac 0e 09
7e be 1d 80 a5 0b 81 6e 54 a5 00 98 93 2f 38 6d
02 16 bf 0e 3e 0e 19 31 15 05 83 2c 0b 13 17 3b
1f 0f 10 16 84 a8 34 bd 82 ac 9b 92 86 2a 8e 96
b1 81 ac a9 b5 85 2d ac 93 bd bb ab b7 a7 a0 9f
58 70 4c 64 62 5c 6a 72 db 76 4f 26 5e 0e 51 41
59 49 18 6a 75 05 7d 6d 4b 63 a9 4d 82 01 be 74
5c dd 14 21 44 8e a5 a1 cc 86 07 56 8a 1b 98 84
50 08 71 22 95 24 23 03 2d 42 6a 94 36 4d e1 8b
31 b1 76 a4 2f 36 81 9d e3 cc 78 70 be bc 90 00
2e 44 8a 12 12 c4 14 49 31 a9 91 e5 bd 40 85 f2
07 37 ae dc f9 e5 aa d4 d6 00 18 af 04 17 82 41
bd a6 40 28 18 d6 85 c7 91 8c f0 92 26 5a 89 69
63 43 8a e4 6a 3c 96 d0 25 86 cc 6d 72 56 12 5a
71 98 9d a4 e7 e9 55 26 9b d5 e4 70 9e 3c 5f d9
df 2b 53 9c 94 42 55 85 a8 1a ac a1 68 d2 74 01
00 80

which is approximately 193 bytes. That’s a 14% reduction. We can therefore afford to store more events to be stored.

Alternatively, you can use another storage method such as indexedDB or better still, use localForage which has decent fallback to localStorage. I used localStorage above because of its simple, cross-platform, synchronous API.

Show me the code!

It would be an interesting project to create a stand-alone JavaScript library, but I think it would be best to contribute it to Mixpanel’s open-source library so that their JavaScript library supports it out of the box. Instead, this blog post was about how to implement it yourself - to show that there’s not a lot going on under the hood. In fact, if you read the mixpanel library source code, you’ll see that it really isn’t that complicated.

However, if you’d like to see a working implementation of the above snippets, do have a look at the Angular service I created for my prayer times app. This can be found here.

A better Ionic starter app

TLDR: I wrote a nice ionic starter app that anyone can use as a boilerplate. You can find it on GitHub.

While I was writing my first Ionic app, I realised there are a lot of tools from front end web development that can be added to the project. The default starter app was a bit too simple.

A better file structure

In the default starter app, every angular component was in its own file.

1
2
3
4
js
├── app.js
├── controllers.js
└── services.js

Opening up controllers.js will show all the controllers of our app. What if we had many? I prefer having a file for each controller.

A better starter app should have each controller, service, constant, etc. in its own file. That way, we can quickly get to the code we’re looking for later on.

1
2
3
4
5
6
7
8
9
js
├── app.js
├── controllers
│   ├── account.ctrl.js
│   ├── chatdetail.ctrl.js
│   ├── chats.ctrl.js
│   └── dash.ctrl.js
└── services
└── chats.service.js

The suffix in the names (.ctrl.js) is optional, but allows us to distinguish between controllers/services with the same name.

Unit testing support with Karma

I was surprised to find that the default project didn’t have unit test support. This was strange because Angular already had really good unit and end to end testing support by default. To fix this, we simply need to add and karma.conf.js. Most of it is the default settings (simply run karma init, make sure you have karma installed), with the following included files:

1
2
3
4
5
6
7
8
9
10
11
{
files: [
"www/lib/ionic/js/ionic.bundle.js",
"node_modules/angular-mocks/angular-mocks.js",
"www/lib/ngCordova/dist/ng-cordova.js",
"www/lib/ngCordova/dist/ng-cordova-mocks.js",

"test/**/*.test.js",
"src/js/**/*.js"
];
}

Now, we can run karma start to run the unit tests. We can also update our package.json to include a testing step. This is useful when using travis for continuous builds.

1
2
3
4
5
{
"scripts": {
"test": "./node_modules/karma/bin/karma start --single-run --browsers PhantomJS"
}
}

Running npm test will run the unit tests.

Concatenating, uglifiying and building our app

We could create an optimized app by putting everything in one file and reducing the number of requests (even if they are all local). To do this, we use a few gulp plugins.

First, we move all our source files into a new folder called src. The plan is to combine all these source files into a single app.js file that will go in the www folder. Here’s how we do it:

1
2
3
4
5
6
7
8
9
10
11
12
13
14
15
gulp.task("build", function() {
return gulp
.src("src/js/**/*.js")
.pipe(sourcemaps.init())
.pipe(
ngAnnotate({
single_quotes: true
})
)
.pipe(concat("app.js"))
.pipe(uglify())
.pipe(sourcemaps.write())
.pipe(header('window.VERSION = "<%= pkg.version %>;";', { pkg: pkg }))
.pipe(gulp.dest("www/dist"));
});

The gulp task is easy to read, but there’s a few things we didn’t mention:

  • The sourcemaps plugin. Here, we write the sourcemap to the same source file. This will allow us to debug the files more naturally in chrome developer tools, even though they are uglified and concatenated into a single file.
  • The ngAnnotate plugin. We use this to allow us to minify Angular shorthand injections. E.g. app.controller('MyCtrl', function($scope){}); becomes controller('MyCtrl', ['$scope', function($scope){}]);
  • The header plugin. We use this to smartly insert the app’s version number inside the app itself. We talk about versioning later in this article.
  • Finally, we write to the www/dist folder. Putting the output into another folder allows us to modify .gitignore so we don’t version the generated files.

While we’re here, we can also modify the sass gulp task so it also goes into the www/dist folder.

1
2
3
4
5
6
7
8
9
10
11
12
13
14
gulp.task("sass", function(done) {
gulp
.src("src/scss/ionic.app.scss")
.pipe(sass())
.pipe(gulp.dest("./www/dist/css/"))
.pipe(
minifyCss({
keepSpecialComments: 0
})
)
.pipe(rename({ extname: ".min.css" }))
.pipe(gulp.dest("./www/dist/css/"))
.on("end", done);
});

Faster page changing using Angular’s $templateCache

When switching between ‘pages’ in a SPA, new template file requests are made. If we move all these template files into a single file and pre-cache it, these requests can be saved. There’s a gulp task for that.

1
2
3
4
5
6
7
8
gulp.task("templates", function() {
return gulp
.src("src/templates/**/*.html")
.pipe(
templateCache("templates.js", { module: "starter", root: "templates/" })
)
.pipe(gulp.dest("www/dist"));
});

Making it play nice with ionic serve

Finally, let’s modify our ionic.project file to make use of the build steps.

1
2
3
{
"gulpStartupTasks": ["default", "watch"]
}

This will run our gulp and gulp watch tasks which we create as follows, in our gulpfile.js:

1
2
3
4
5
6
7
gulp.task("default", ["sass", "templates", "build"]);

gulp.task("watch", function() {
gulp.watch(paths.sass, ["sass"]);
gulp.watch(paths.js, ["build"]);
gulp.watch(paths.templates, ["templates"]);
});

Great, now every time we make a change, our build will be triggered and the page will automatically refresh!

Updating our app version

Finally, I noticed that every time I update my app version number, I have to update it in quite a few places. package.json, bower.json, config.xml, and anywhere I use it inside my actual app (e.g. in the ‘about’ page). Instead, it would be nice to do this once. Luckily there’s a gulp task for that, and it’s really simple:

1
gulp.task("bump", require("gulp-cordova-bump"));

Now when I want to update my app version number, all I have to do is run one of the following:

1
2
3
4
$ gulp bump --patch
$ gulp bump --minor
$ gulp bump --major
$ gulp bump --setversion=2.1.0

And gulp will patch everything up. Oh, and remember that banner step in the build mentioned above? Well, this will get the version number from our package.json, put it into our compiled app.js script as a global variable (window.VERSION), and we can now use it in our app! To make it play nice with Angular, we can put it into our $rootScope so we can use it directly in our template. We simply add the following line in our run block:

1
2
3
4
.run(function($ionicPlatform, $rootScope) {
$rootScope.VERSION = window.VERSION;
// ...
}

and we can use it in any template:

1
2
3
<div>
App Version {{VERSION}}
</div>

Show me the code

Feel free to work with it on GitHub:
https://github.com/meltuhamy/ionic-base.

Credits

Post thumbnail and image are from the Ionic project.

Ionic Speed: Writing a prayer times smartphone app in a day

Update: I’m happy to announce the app has been released on the Google Play Store. Check it out!

Whilst I was in Belfast, I promised my sister I’d finally write an app for them to show our Mosque’s prayer times. Initially I planned to use this as a chance to learn some new tech such as native iOS and Android development, but unfortunately I kept procrastinating and didn’t manage to do it. With a couple of days remaining before leaving Belfast, I realised I had not fulfilled my promise, and decided: what’s the fastest way to write an application that works and looks nice - given my current skill set? The answer was obvious. Ionic Framework.

Ionic Framework as an obvious pick because of the following reasons:

  • I already have experience writing Angular apps. I could jump right in and know what I’m doing.
  • The app I’m making is really simple, and I already have an idea of how it’ll work.
  • I want my app to work on iOS and Android, and I don’t have the time to write different apps for each platform. Ionic works this out for you ;)

So going ahead with Ionic, I set it up straight away.

Wait, what are you building again?

Muslims pray five times a day. The times of prayer is based on the position of the sun in the location you’re in. While you can work out the prayer times using some math (and in fact there are hundreds of apps that already do this), there is an added importance of praying at the same time as other Muslims in the area. So if everyone in the city used their own app that works it out, each person would be praying at different times! The solution was to use the prayer times at the Mosque that’s closest to you. Fortunately in Belfast there are only two mosques, and they use the same prayer timetable. So, I decided to write an app that uses the mosque’s prayer times.

A screenshot of the app in action

Setting up

So many tech. So little effort to set up.

I followed the normal set up procedure without worrying too much about the details. It really is this easy:

1
2
3
4
5
6
npm install -g cordova ionic
ionic start belfastsalah tabs
cd belfastsalah
ionic platform add ios
ionic build ios
ionic emulate ios

App structure

By default, the Ionic app structure looked something like this:

  • app.js
  • controllers.js
  • services.js

And each file contained all the angular components of our app. I prefer structuring the app differently, so each service, controller, and so on is in its own file.

  • app.js: Contains config and module definitions.
  • constants/: Inside this folder, all our angular constants (in our case, our prayer time data) will go here.
  • controllers/: Each controller will live in its own file in this folder
  • filters/: same for filters
  • services/: and services

Now that we have a much better structure, we can now think about the services, controllers, constants and filters we need. Luckily, I already had all the data for the prayer time table. It’s essentially a JSON array containing objects for each day in the year - so for 366 days we had 366 objects. Each object is an array representing the different prayer times of that day. For example, here’s what 1 January’s prayer times looks like:

1
["1","1","06:49","08:44","12:29","13:55",null,"16:11","18:00"]

This file would go in as an angular constant, so we can inject it as a dependency wherever we need it.

Now, we define our services. We need a service that keeps track of the time ticking, I called it the Ticker service. We also need a service that gets the required prayer times for a day or a month. I called it PrayerTimes. We define and implement a few methods: getByDate would get the prayer times given a JavaScript Date object. getByMonth would get the prayer times for a whole month, and getNextPrayer would get the next and previous prayers and their times, given a JavaScript Date object.

Finally, we define our controllers. We essentially define a controller for each tab. We therefore have three: Today, Month, and Settings. The Today controller would make use of the Ticker and PrayerTimes services to update the remaining time for the next prayer. The Month controller would simply display all the times for the current month, and the Settings controller is a work in progress, but would allow disabling and enabling app notifications (see conclusion).

Adding some goodies to help us out

To save time and effort, I used lodash, moment.js, and angular-moment to help with array searching, time calculations, and displaying times as strings in the view. To do this with Ionic, you can simply type ionic add &lt;package name&gt; and Ionic will take care of it (uses bower).

Conclusion and source code

Overall, it was incredibly easy and fast to get the app finished. In fact, Ionic allowed me to also test the app without having to connect a device using their Ionic View service. Really, the only thing left is easy deployment / integration with Google Play Store / AppStore, though I’m not sure if that’s even possible.

There are a few things left, however. I didn’t get time to set up notifications for prayers, but this is certainly feasible using the localNotification cordova plugin. Hopefully I can get this done in a future version!

Check out the source code on GitHub.

Your browser is out-of-date!

Update your browser to view this website correctly. Update my browser now

×